Are you experiencing issues sending out Emails via your WordPress platform? Are you still ignorant of SMTP mail server functionalities and looking for reliable moves to use them? Here, your search stops. We will address the use of the SMTP mail server to send WordPress emails from scratch.
What is an SMTP mail server?
A device or application that is capable of sending emails is an SMTP server. It runs according to the Simple Mail Transfer Protocol (SMTP). Emails from the email client are received by an SMTP server. It then transfers them to another SMTP server and transmits them to the mail server where they are addressed. Devices that manage particular resources are servers. For coping with correspondence, a mail or email server is intended.
By default, WordPress sends its emails using the PHP Mail feature. It further slows the process down and hinders the process of mass mailing. Using the SMTP mail server to send WordPress emails is one of the quicker and more open ways to solve this issue.
How does the SMTP mail server work?
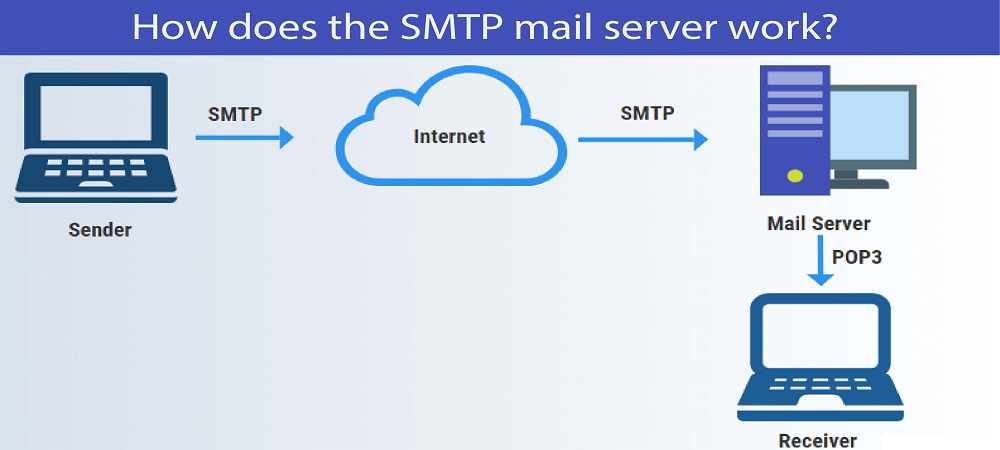
A mail user agent, which may be your email client or an application that communicates to your domain's Ip address. This is referred to as an SMTP interaction. The communication is often made by an SMTP port and other options. The SMTP event starts until associated. The user sends the email addresses of the transmitter and receiver, and also to the email body & annotations, to the server database.
The SMTP server or, more generally, the mail transfer agent verifies that the recipient's and the sender's domain names are similar. If it really is, the mail immediately goes to the database of the client. The SMTP server needs to deal with the Domain Name Server if the domains are distinct (DNS) that supplies the IP address of the receiver. All this possible if you are using the best wordpress hosting services to handle your domain.
To connect with other clients and servers on the Internet, an SMTP server has a web address. It typically looks like smtp. or mail. A domain name plus that. If you've set up a local SMTP server, rather than using a web address, you can use its IP address. Linked mail service users can locate SMTP server address data by looking up the domain's MX data.
Let’s acknowledge the 10 steps to use an SMTP mail server to send Emails in WordPress:
1. Create an email account:
This is the very first step in the process of signing into the website's hosting server to create a business account. Go to your profile settings and opt to add/create an account to open your website. You should prefer to go for the name of the id/account that specifies the name of your website as well, where you have to connect the site's domain name to your account name. For example; aaa@bbb.com where bbb.com is your domain name. You are also suggested to optimize the size of the mailbox based upon your preference.
2. Collect SMTP host and port:
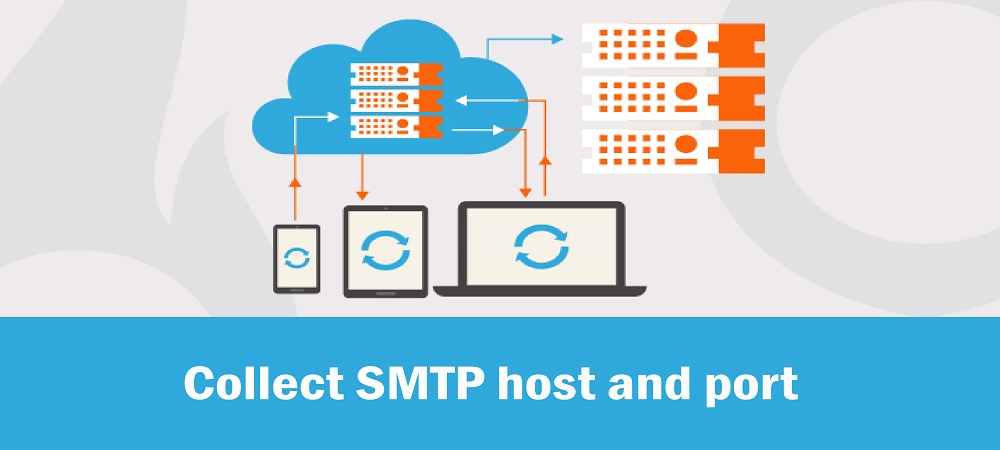
You are supposed to get the SMTP host for your email address and the SMTP port for a stable login after you have established the email account. This option can be accessed from the support section of your hosting website. If the SMTP host and port cannot be found in the support section, you can contact your hosting server's customer service to request this information.
3. Install SMTP mail plugin:
Depending on the specifications, you should select a suitable SMTP plugin for the WordPress site. Go to the plugin section of the WordPress site and search for "SMTP", you get over 400 SMTP mail plugins. If you are a novice, you should choose the plugin with the highest number of live installations and feedback, check the compatibility of the plugin with the new WordPress. Thereafter you can successfully install and active the selected plugin.
[NOTE: The steps mentioned further are specified to configure the WordPress plugin for SMTP mail server]
4. Add info. to start configuring the plugin:

First of all, you need to register an email address on your hosting site that you have just created. You will then apply a 'from name' that refers to your website activity, which will be used by the SMTP mail server as the sender name. If you fail to mention the name of the sender in the plugin, the plugin will use the default name for the sender.
5. Choose mailer for the account:
Generally, we pick other SMTP mail server alternatives as the mailer to send or receive Emails from your WordPress account. It can rather be considered as one of the steps of inbound marketing strategy.
6. Select the return path for the mails:
Checking the return path box is an important move in the plugin setup since this unique option sets the return path to match the email address of the sender. Bounced and non-delivered emails would be lost if left unchecked and might not show up in the outbox.
7. Set-up SMTP options:
This is the phase where the data you have obtained from your hosting site is requested, i.e. Host SMTP and port SMTP. Carefully enter both of the specifics in their respective columns.
8. Choose encryption for the account:

Mainly, WordPress hosting platforms support SSL and TLS encryption styles. You have to pick the one that your hosting platform supports. Then turn on the authentication toggle. This crucial move in adding encryption is to improve the website's level of security.
9. Enter SMTP username & password to proceed:
You now need to enter the username of your SMTP and set the password. At last, save all the settings you have done till now. Generally, we use an email address with an SMTP username. Here, the password you created is stored as insecure plain text. You need not worry because further, we will discuss how to secure the password.
10. Test the SMTP settings:
When you want to deliver your emails from WordPress using SMTP, you can evaluate them correctly before hitting the mailboxes of actual clients. If you use a plugin, you can use its feature to send test emails to your own mailbox. But if you directly implement SMTP, it is important to test whether sending emails really works. Configure your SMTP server to evaluate the usability of sending emails, and view rendered messages.
NOTE:
The plugin, furthermore, also offers you an alternative to rendering it more stable. You would need to apply some coding to your wp-config.php file to do so. You would first need to attach to your website using cPanel's FTP client or File Manager app. When linked, you'll find your wp-config.php file in your website's root folder. This file can be accessed with any plain text editor, such as TextEdit or Notepad. Don't fail to use your real SMTP password to substitute 'your' password.' Save and submit the wp-config.php file back to the server after that. You can access your WordPress admin area now and go to the WP Mail SMTP Settings tab. Drag down to the segment on SMTP options and you can note that the login area is now unavailable.
CONCLUSION:
First and foremost, the most noticeable gain is that you will use your own WordPress licensed email address for outgoing addresses. Another value is that, by signing up for your hosting account, you have indeed paid for this program that is a beneficial aspect of a company’s inbound marketing strategy. For sending and receiving emails, you won't need to spend any extra cost. So, to help you out in planning your website marketing strategy, I have listed a thorough overview of how to deal with SMTP mail servers to send Emails in WordPress.